
The waitlist feature allows patrons to join a standby list for sold-out events, providing them with an opportunity to be notified if more tickets become available.
Waitlist and Pre sale (tickets not on sale yet) can not be done at the same time! If you're doing a pre-sale event, disable the waitlist on the event first under the marketing tab for the event.
PLEASE NOTE: To use the Waitlist function the promoter account must be in multi-step checkout under SET UP > EVENTS > EVENT SETTINGS.
Click the GENERAL SETTINGS icon and make sure the ticket selection process and set to Multi-Step Checkout.

The event can not be in single step checkout. Events that use single step checkout display all event dates on a single page, therefore the wait list can not be used in this event set up.
Important: A Waitlist notification does not reserve or hold tickets. After receiving a notification, the patron must make a reservation while tickets are still available. |
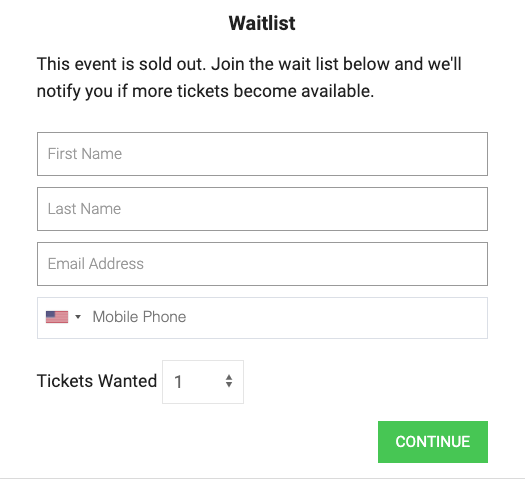
What patrons see
When an event is sold out, the event page displays a No Tickets Available message. Patrons can select ADD TO WAITLIST to join the waitlist.
Enable and configure the Waitlist
1. Go to Events > Events Settings > Event Settings.
2. Select Waitlist.
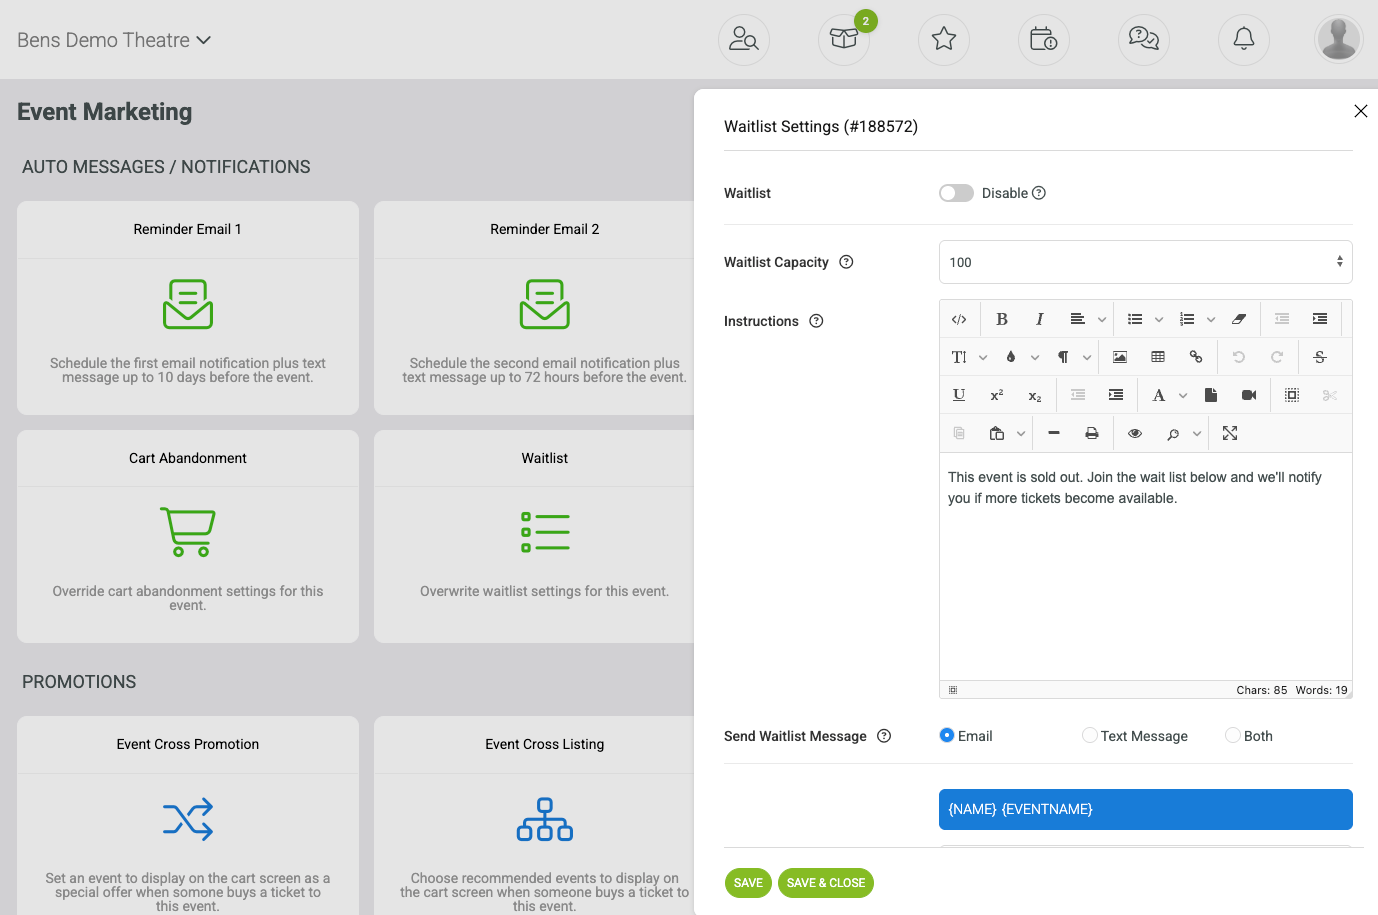
3. Enable the Waitlist and set the Waitlist Capacity.
4. Enter the instructions patrons should see when joining the waitlist.
5. Under Send Waitlist Message, select Email, Text Message, or Both.
6. Customize the notification subject and message as needed.
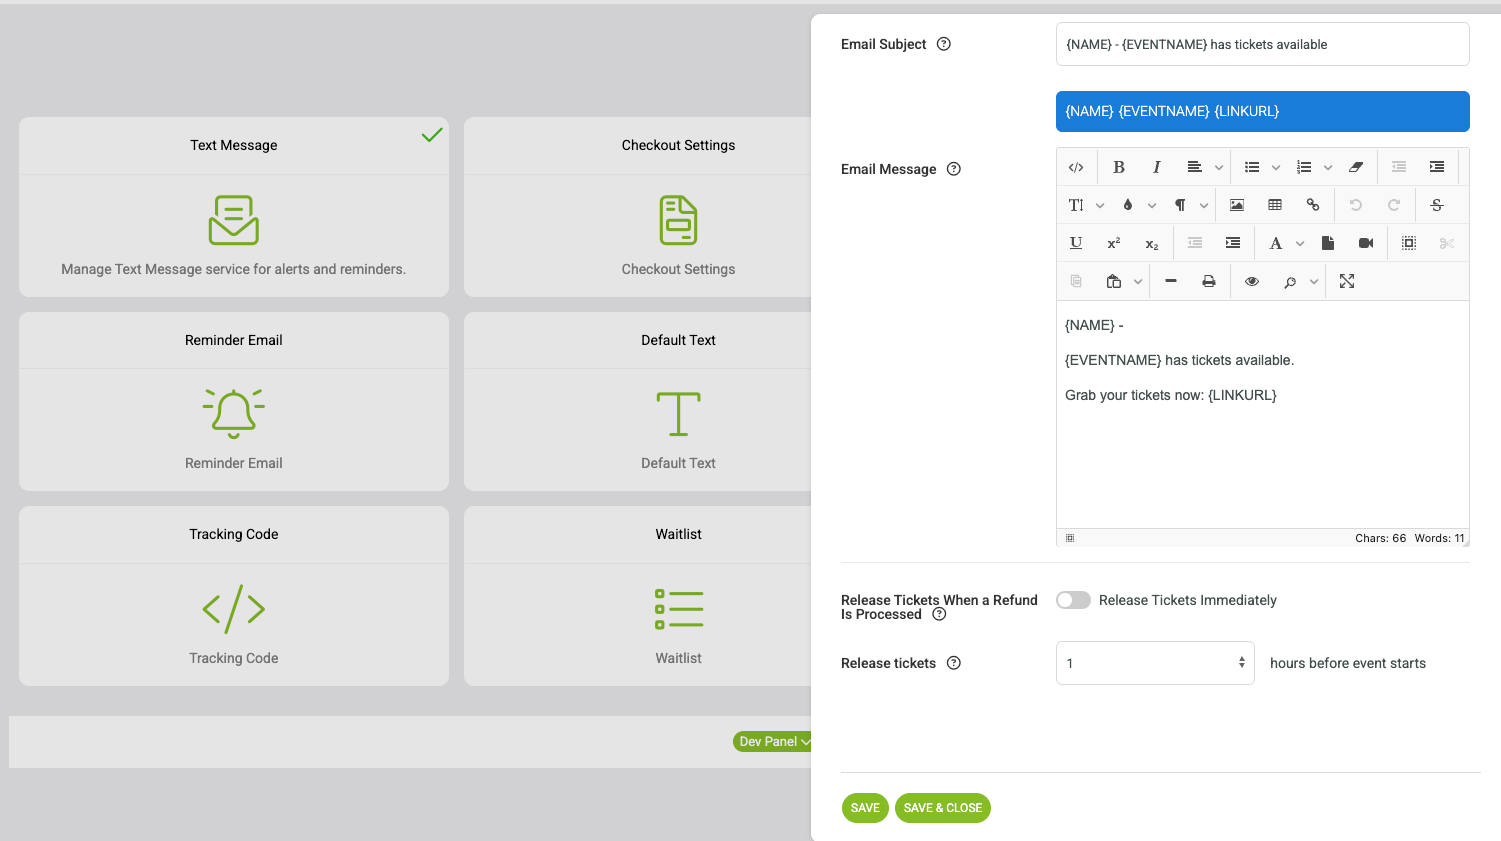
Global Waitlist settings in Event Settings.
Placeholders fields shown in the Waitlist settings include:
{NAME}
{EVENTNAME}
{LINKURL}
Text messaging: Twilio text-message fees may apply when mobile phone notifications are used. |
Release refunded tickets
Waitlist settings can also control when refunded tickets return to available inventory. Configure the release option in the Waitlist settings according to your organization’s workflow.
1. Go to Events > Manage Events and locate the event.
2. Select Marketing from the select action menu.
3. Open Waitlist and adjust the settings for that event.
4. Select Save or Save & Close.
Manage the Waitlist
1. The waitlist button will only show when patrons are on the list.
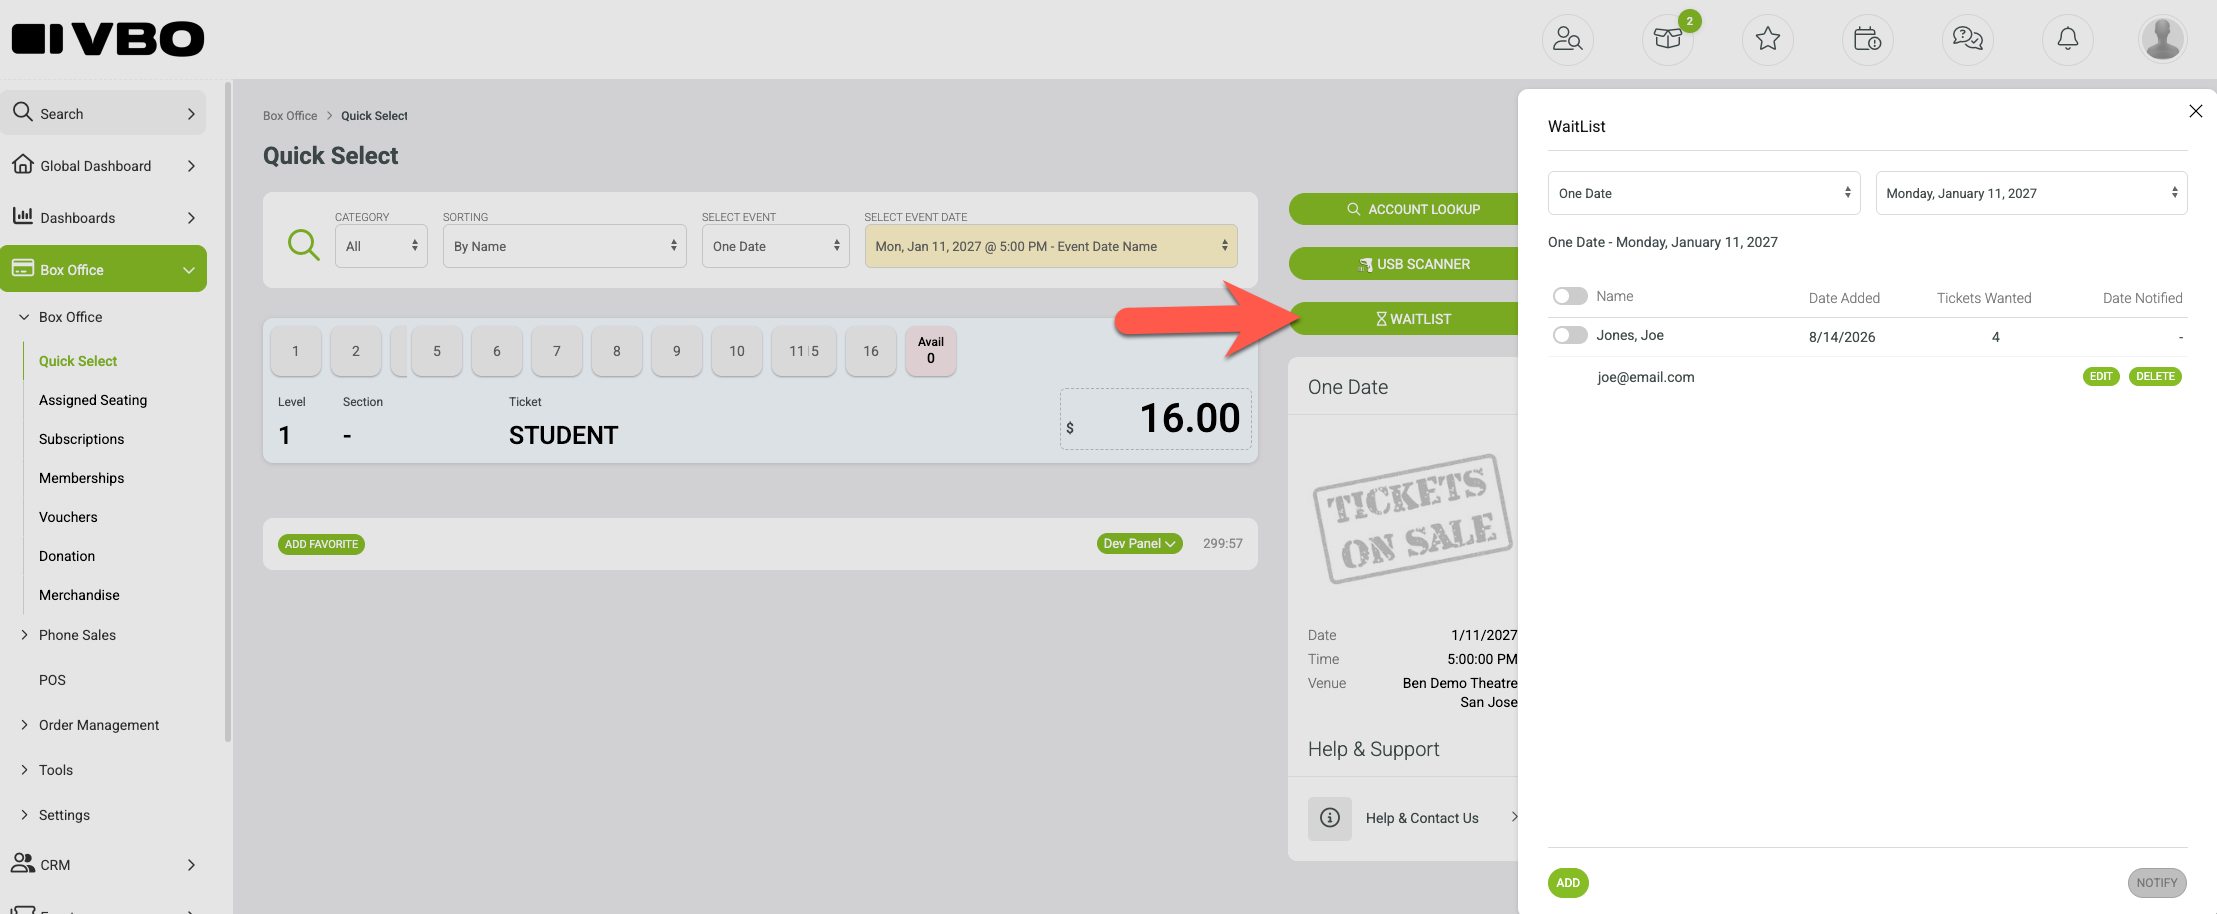
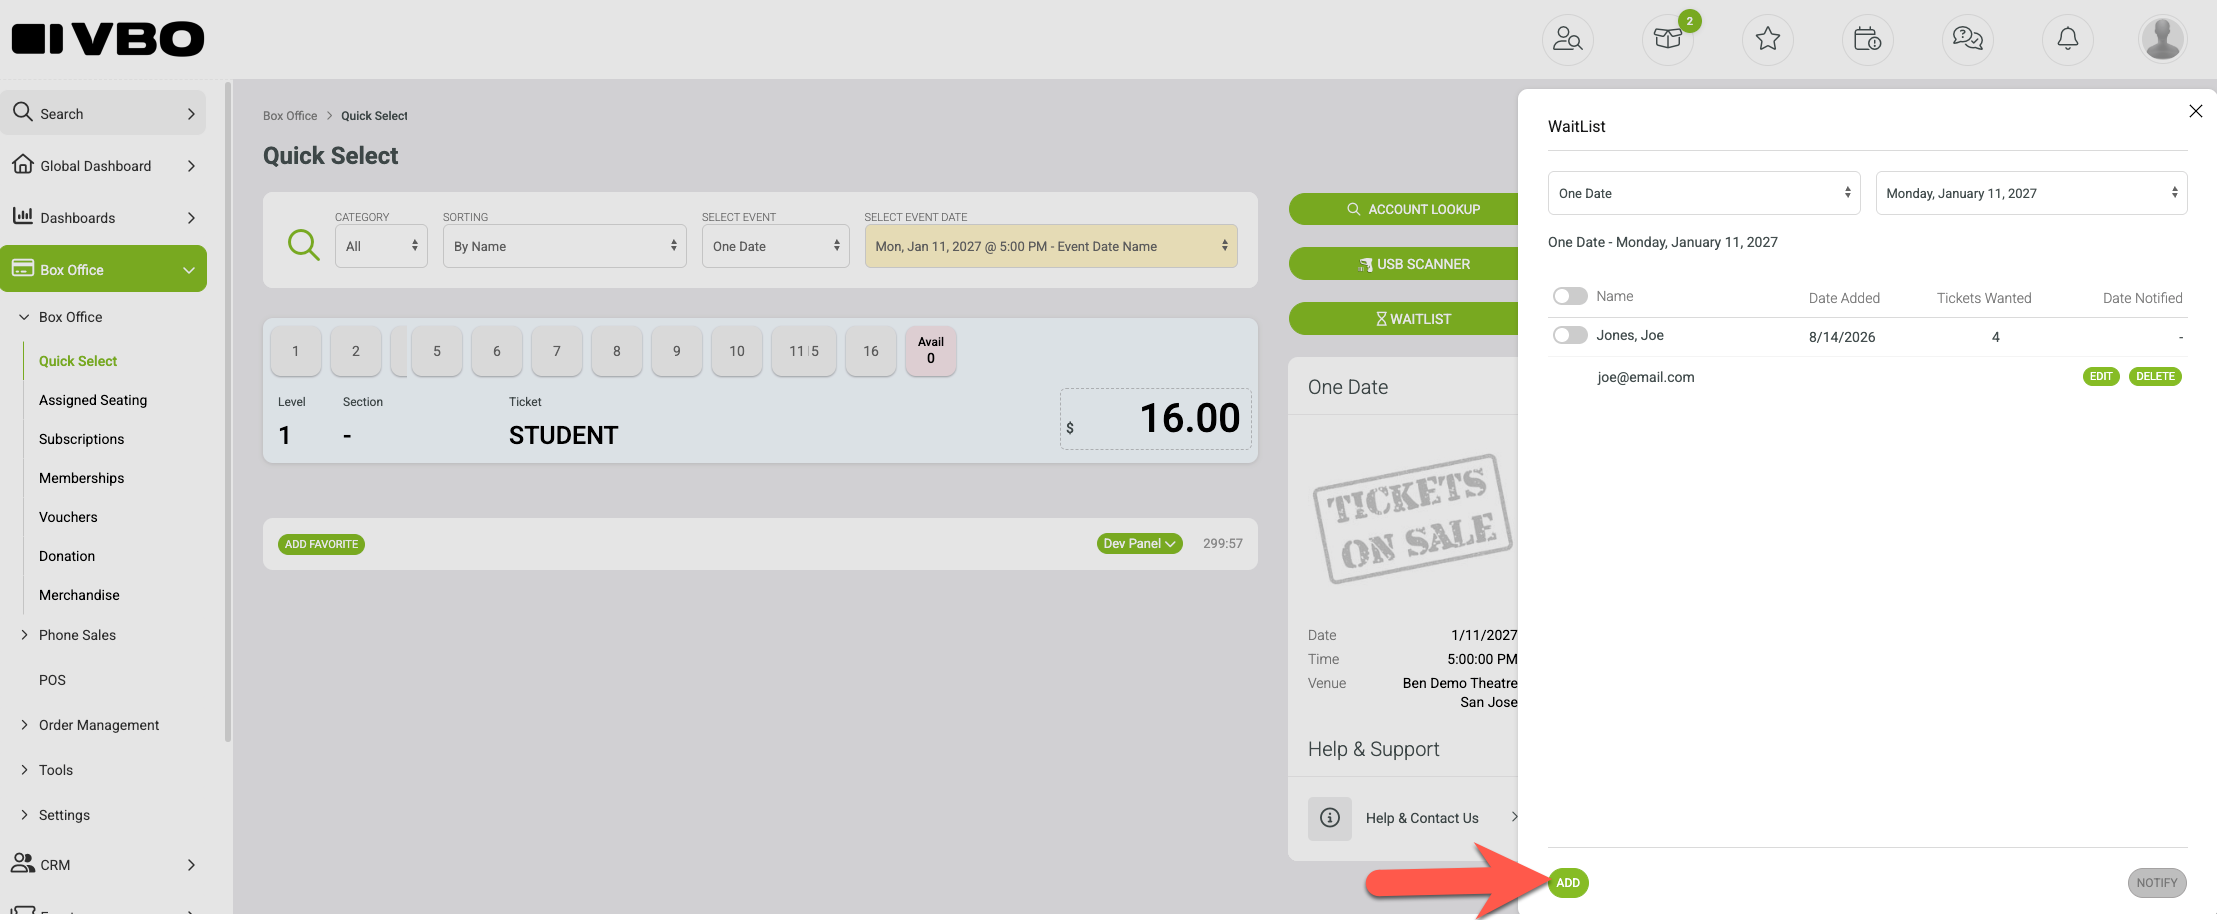
2. Go to Box Office > Select the event and date, then select Waitlist.
3. Review patrons on the Waitlist. The list shows the patron, date added, tickets wanted, and date notified.
4. Use Edit or Delete to manage an existing entry.
Add a patron manually
1. From Box Office > Waitlist, select the appropriate event and date.
2. Select Add.
3. Enter the patron’s name, email address, and number of tickets wanted.
4. Select Save.
Notify patrons when tickets become available
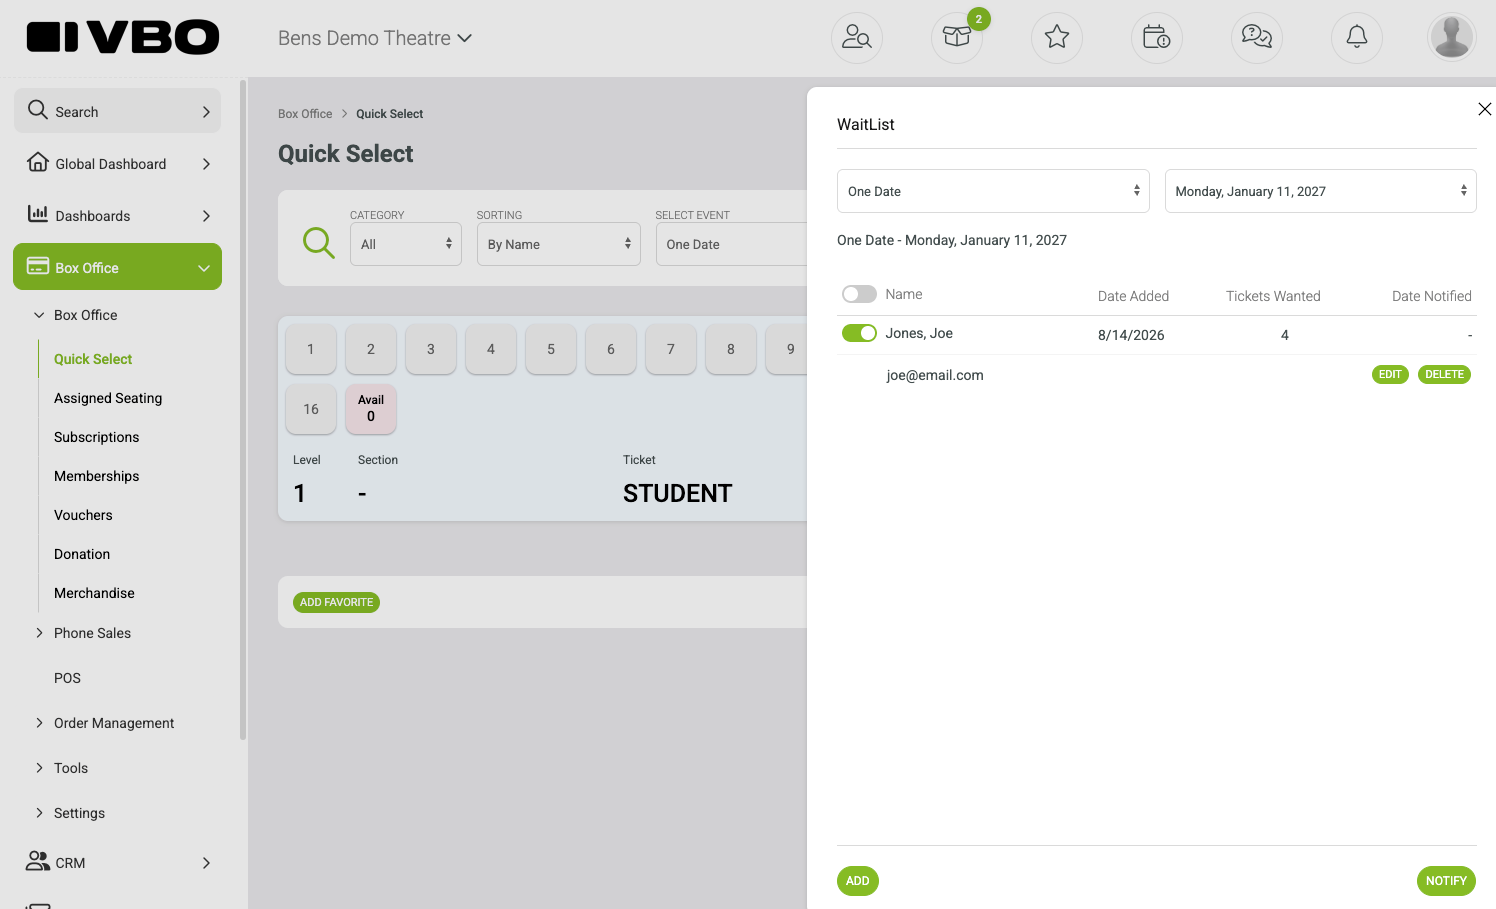
1. Go to Box Office > Waitlist and select the event and event date.
2. Select the checkbox next to the patron or patrons you want to contact.
3. Select Notify.
4. VBO sends the configured email and/or text notification and records the Date Notified.
Reminder: Notification only tells the patron that tickets are available. It does not create a reservation. The patron must make a reservation after being notified. |
How to be notified someone has been added to the waitlist
Subscribe to Event Sold / Waitlist alert under Set Up > Organization > Alerts and Notifications to be notified when an event sells out or patrons are added to the waitlist.
