
Use registration forms to collect attendee information with a ticket purchase. Create a reusable form, add questions, and attach the form and a registration type to the appropriate ticket. This guide uses a Workshop Registration form with an Attendee type.
1. Create a registration form
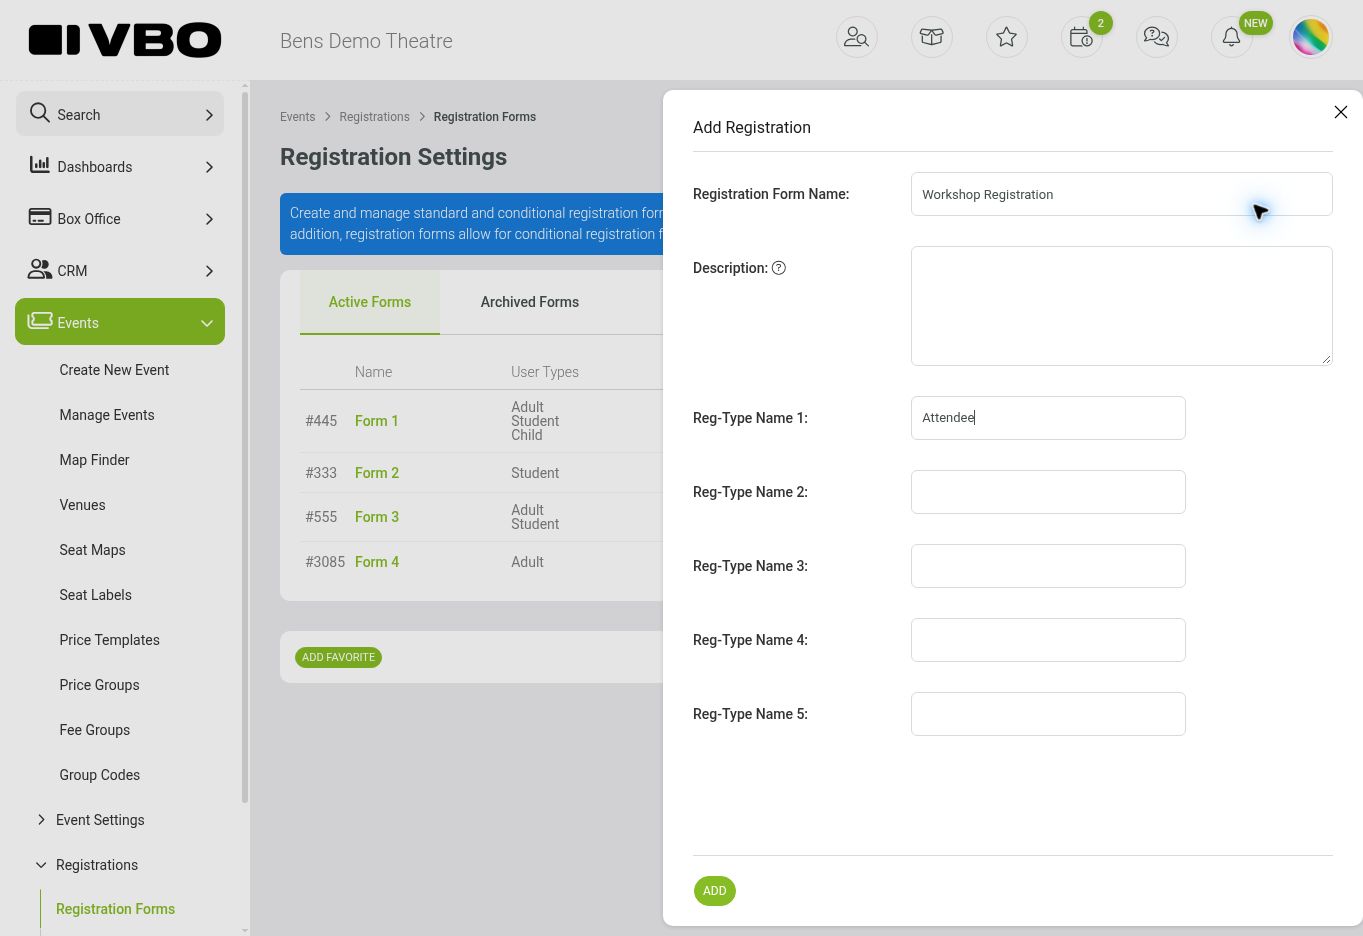
- In Event Manager, go to Events > Registrations > Registration Forms.
- Click Add Form.
- Enter a Registration Form Name, such as Workshop Registration.
- Enter Attendee in Reg-Type Name 1. Registration types let one form serve different audiences, such as Attendee, Student, or Guest. You can define up to five types.
- Click Add, then click Manage beside the new form.
If Registrations is missing from your menu, ask your account administrator to check your registration permissions.
2. Add questions to the form
Under Registration Form Fields, choose a Field Type, enter the Long Name (Public) and Short Name (Internal), select the user types that should see the field, and click Add. The public name is the question shown to patrons. The internal name identifies the field in the builder and reports.
For this example, add these fields in order. Keep Attendee selected on every field.
| Public question | Internal name | Field type | Options | Settings |
|---|---|---|---|---|
| First name | First name | Text | — | Required |
| Last name | Last name | Text | — | Required |
| Will you attend dinner? | Dinner | Radio | Yes, No | Required; enable Trigger after adding |
| Meal choice | Meal | Selectbox | Chicken, Vegetarian, Vegan | Hidden and Required; add a condition |
| Dietary details | Dietary | Text | — | Hidden and Required; add a condition |
Enter choice lists separated by commas. Required asks the patron to complete a visible field. Hidden keeps a follow-up question out of view until its Show condition is met. A field must be assigned to the registration type used by the ticket to appear for that ticket.
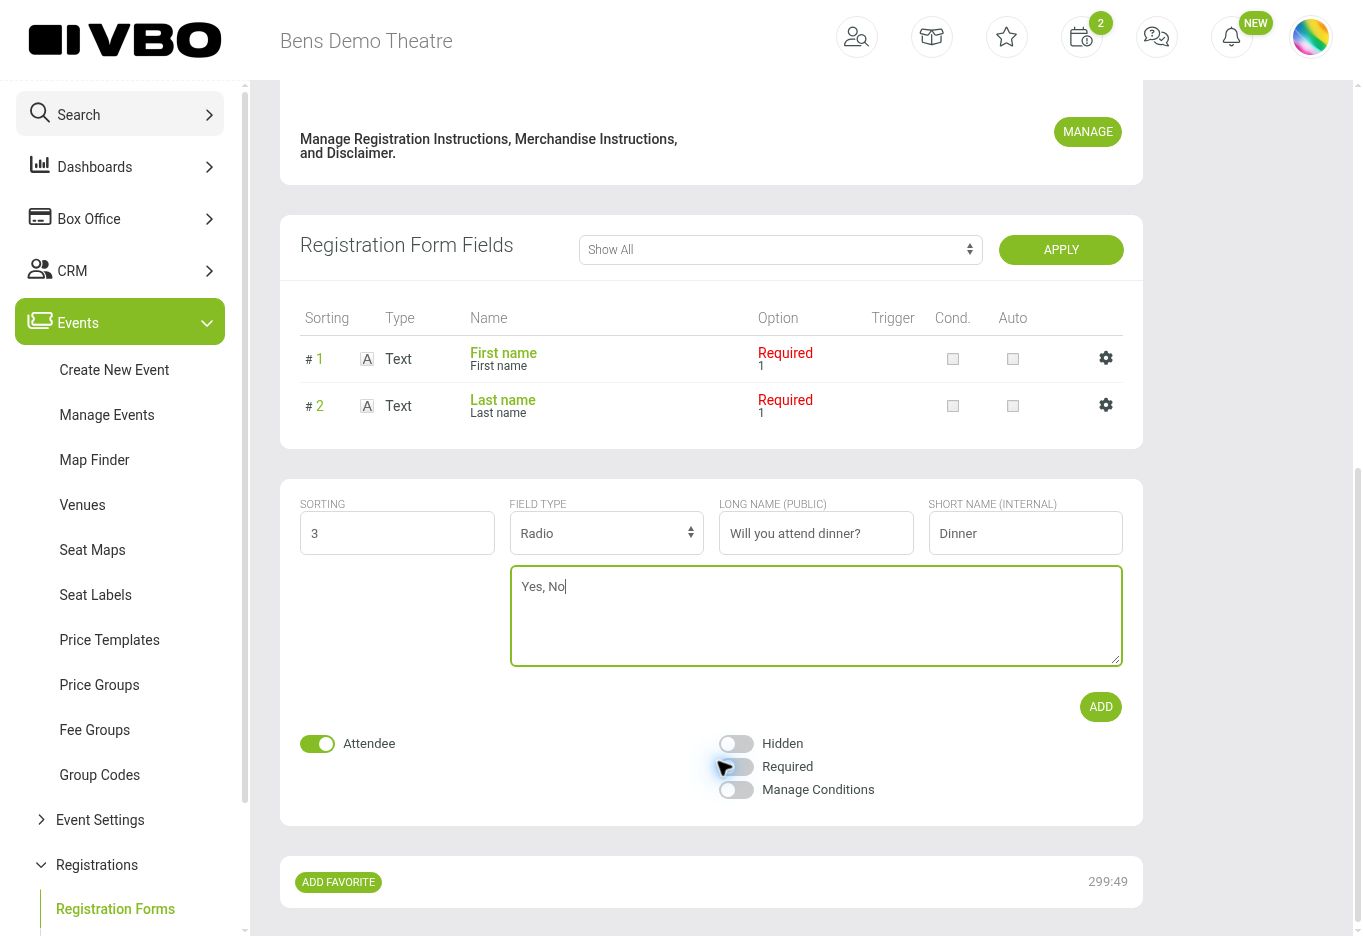
Click a field name to edit it. Click its sorting number to change its position. Other field types include Header, Message, Text Box (multi-line), Date, Checkbox, Checkbox (price), Checkbox (multi-choice), Signature, and Upload where available. A priced checkbox adds its configured charge when selected.
For Text fields, Primary can use the response as the attendee name. Checkout Value maps an answer to a billing field. Use these only when that mapping fits your form.
Use Manage in the Registration User Types panel to edit registration instructions and other form text. Preview the patron flow to confirm which text appears in your checkout.
3. Add conditional responses
Conditional responses show or hide a question based on a previous answer. The earlier question is the parent/trigger; the follow-up is the child. Radio, Checkbox, and Selectbox fields can be triggers.
Show Meal choice when Dinner is Yes
- In the Dinner row, turn on the control in the Trigger column.
- Make sure Meal is marked Hidden and Required.
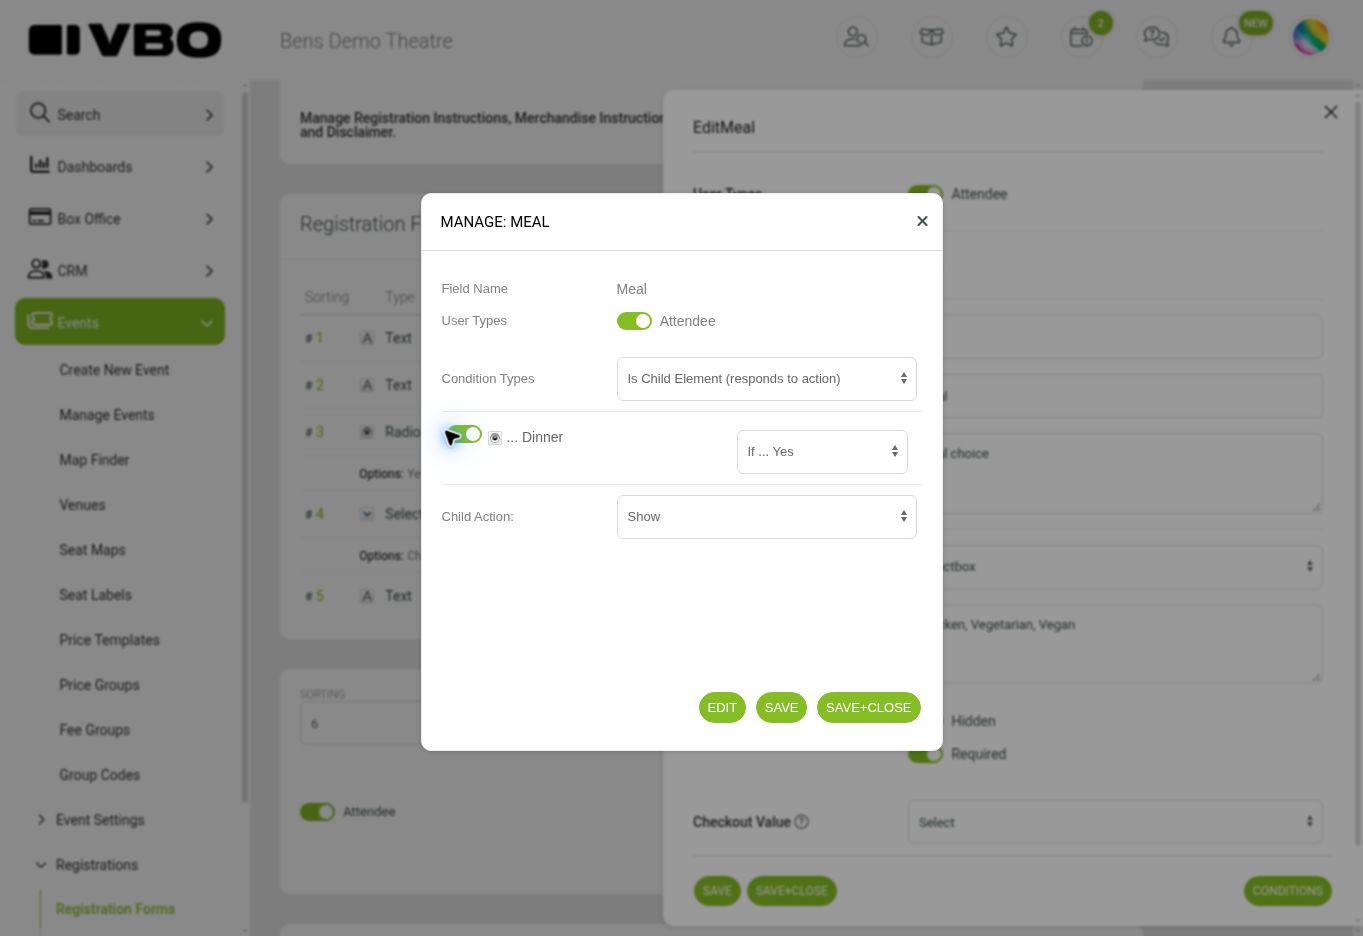
- Click Meal to edit it, then click Conditions. You can also use its control in the Cond. column.
- Choose Is Child Element (responds to action).
- Keep Attendee enabled. Enable Dinner, then choose If ... Yes.
- Set Child Action to Show, then click Save+Close.
Optional: show Dietary details for Vegetarian or Vegan
- After saving Meal’s Dinner condition, turn on Trigger in the Meal row. Meal now both responds to Dinner and triggers another question. The condition dialog also calls this Is Both (Parent and Child).
- Keep Dietary marked Hidden and Required.
- Open Dietary’s Conditions and choose Is Child Element (responds to action).
- Enable Meal, select Vegetarian and Vegan, and set Child Action to Show.
- Keep Attendee enabled and click Save+Close.
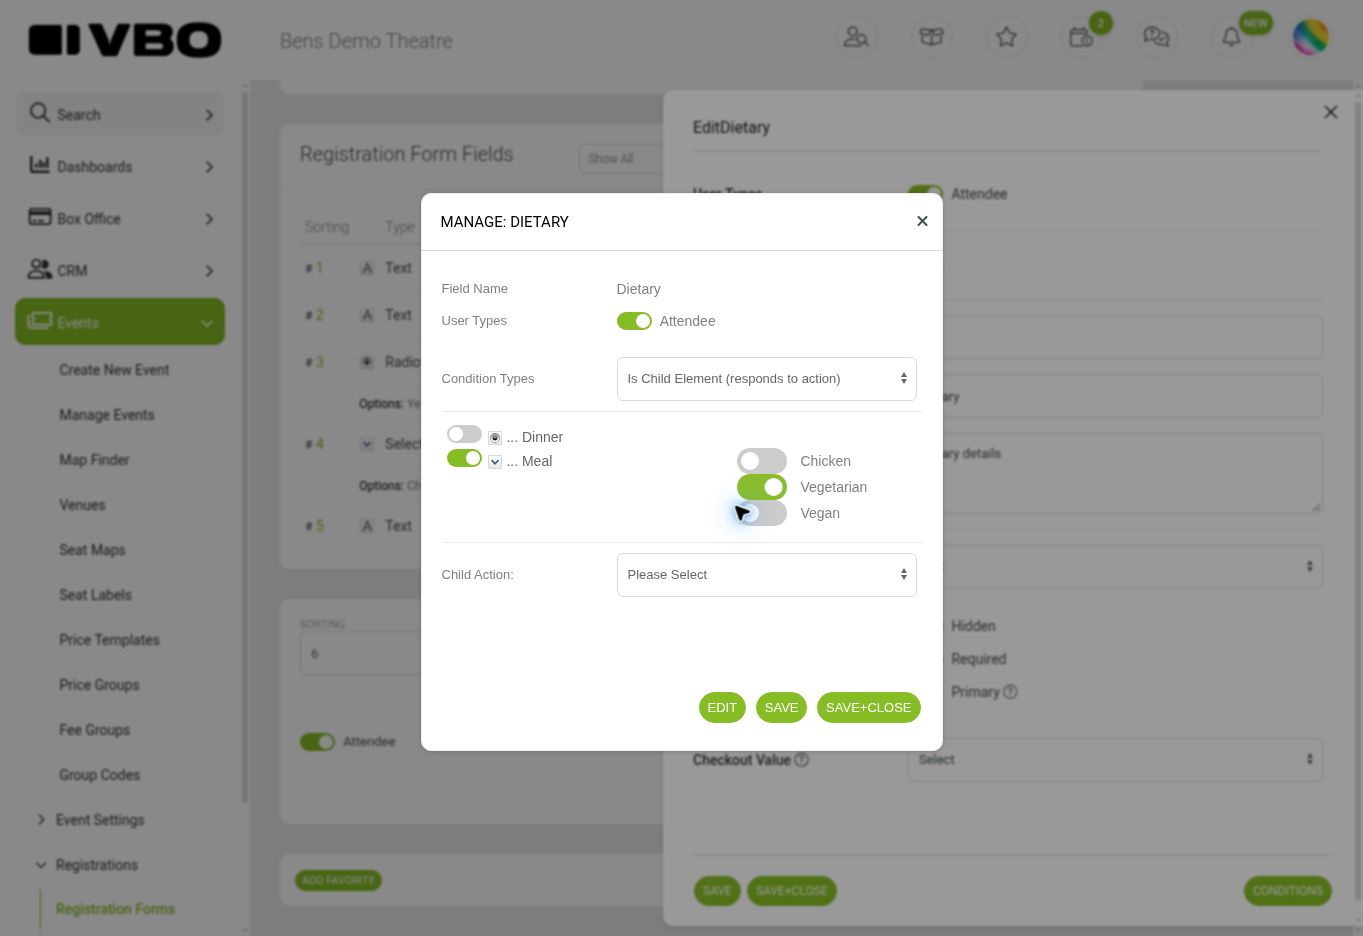
Multiple selected choices from one Selectbox are alternatives: Vegetarian or Vegan. If you select multiple parent questions for one child, all selected parent rules must match. Leave unrelated parents off.
Test before using nested conditions: click Preview and test Yes, No, each meal option, and changing an earlier answer after filling a follow-up. Allow each update to finish. Dependent questions may not all refresh immediately when an earlier answer changes. If the result does not match your intended flow, simplify the form or contact support before using it for sales.
4. Attach the completed form to a ticket
- Open your event and go to Tickets + Pricing > Manage Tickets.
- Select the correct event date.
- Click the ticket name, then More Options.
- Set Registration Form to Workshop Registration.
- Set Registration Type to Attendee.
- Click Save+Close.
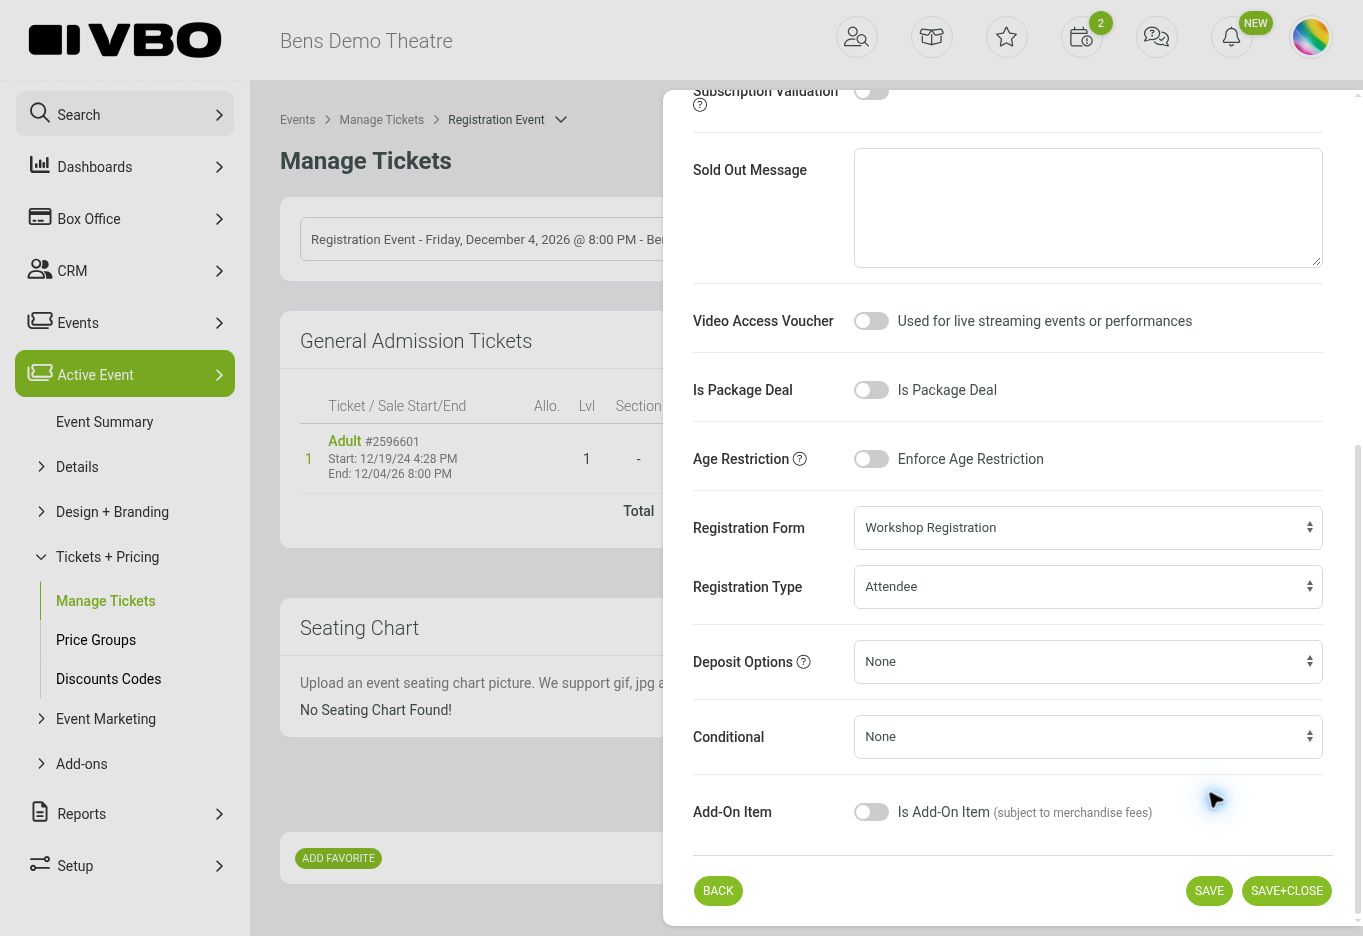
The attachment applies to that ticket row on that event date. Repeat for other tickets or dates that need a form. No special registration event category is required. The separate Conditional setting on the ticket screen controls conditional ticketing; use the form builder for conditional questions.
5. Preview the form online
- On Manage Tickets, click Preview to open the event online.
- Select a quantity for the ticket with the form attached and click Order Now.
- Complete the registration questions. Choose Yes for dinner to reveal Meal choice; choose Vegetarian or Vegan to reveal Dietary details.
- Complete visible required fields, then use Save Registration to continue in the checkout shown here.
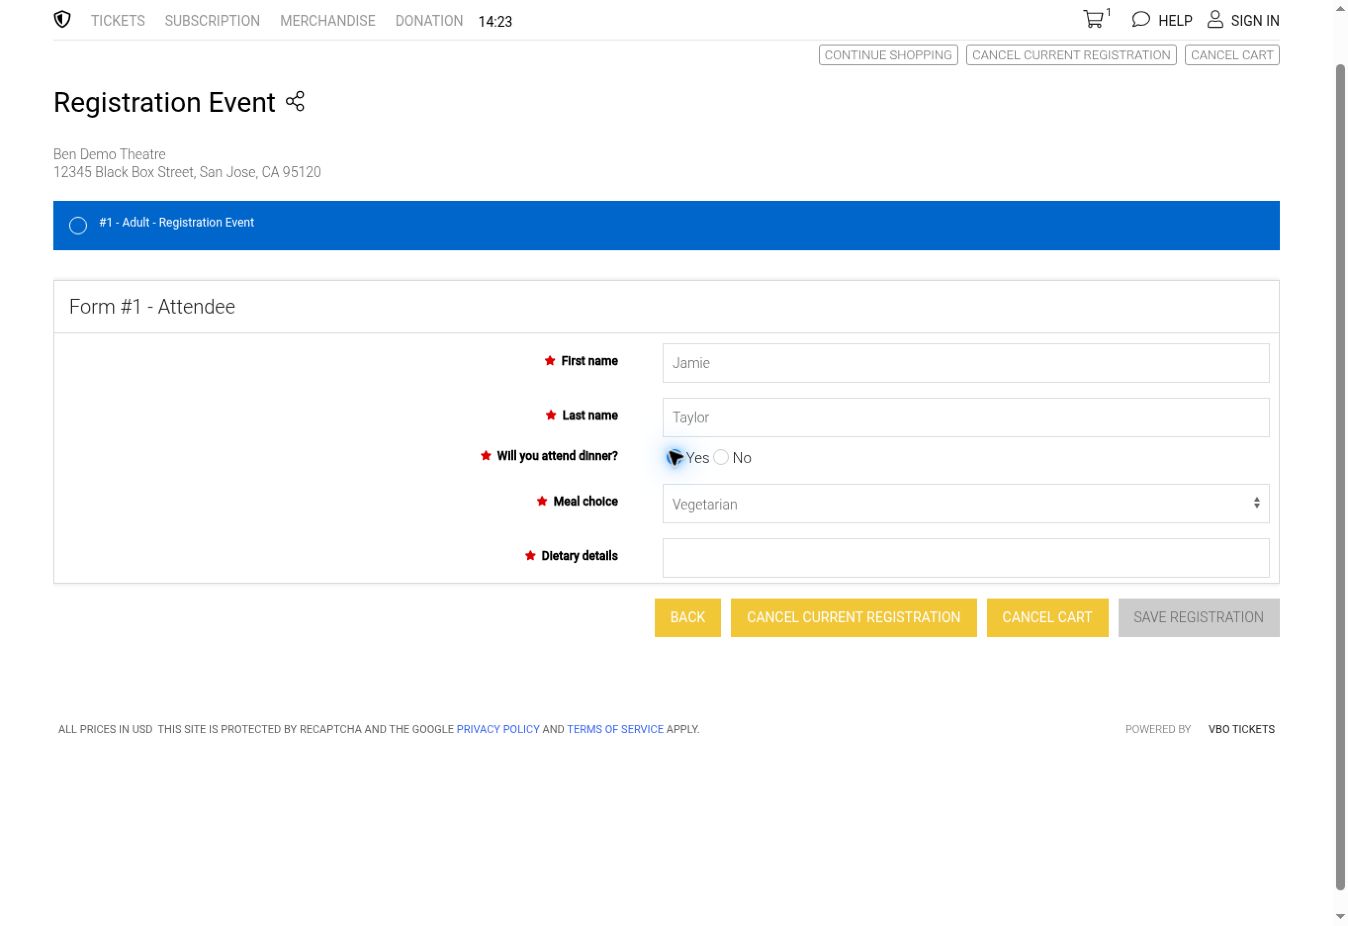
Checkout appearance and button labels can vary. Test multiple tickets as well as one ticket: each attendee needs their own registration answers. A preview lets you inspect the form without completing payment.
6. Complete registration after a Box Office sale
In Box Office, staff can sell the ticket first and complete its registration afterward.
- Go to Box Office > Box Office > Quick Select.
- Select the event and date, add the ticket, and confirm the selection.
- Click Pay Now and complete the sale with the appropriate payment method. The example below is a cash sale in a demo account.
- On the confirmation screen, click Edit Registration Form.
- Select the ticket/date link to open that attendee’s form.
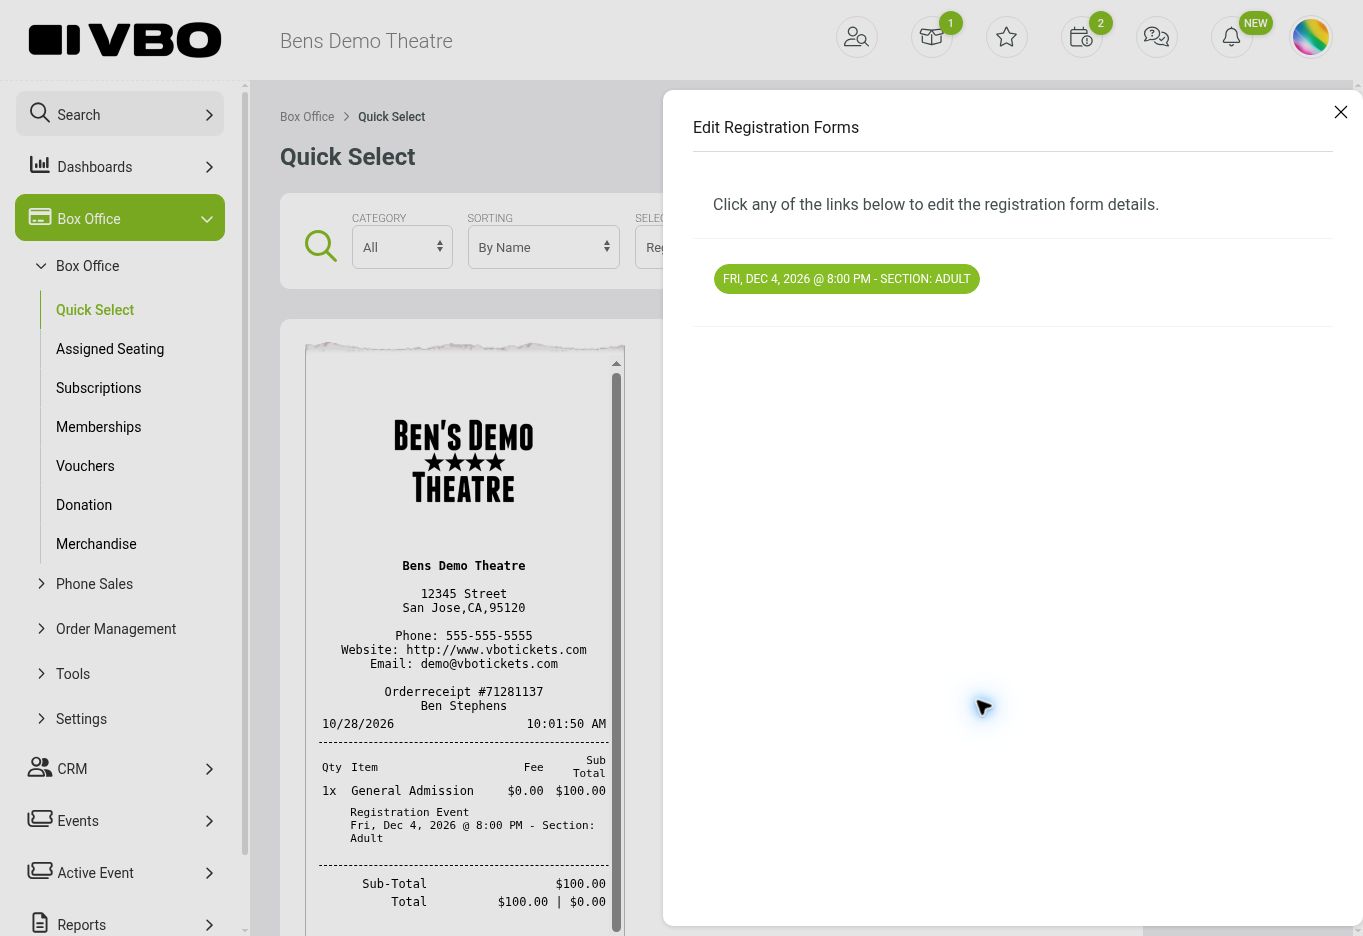
- Enter the attendee’s answers and click Save or Save+Close.
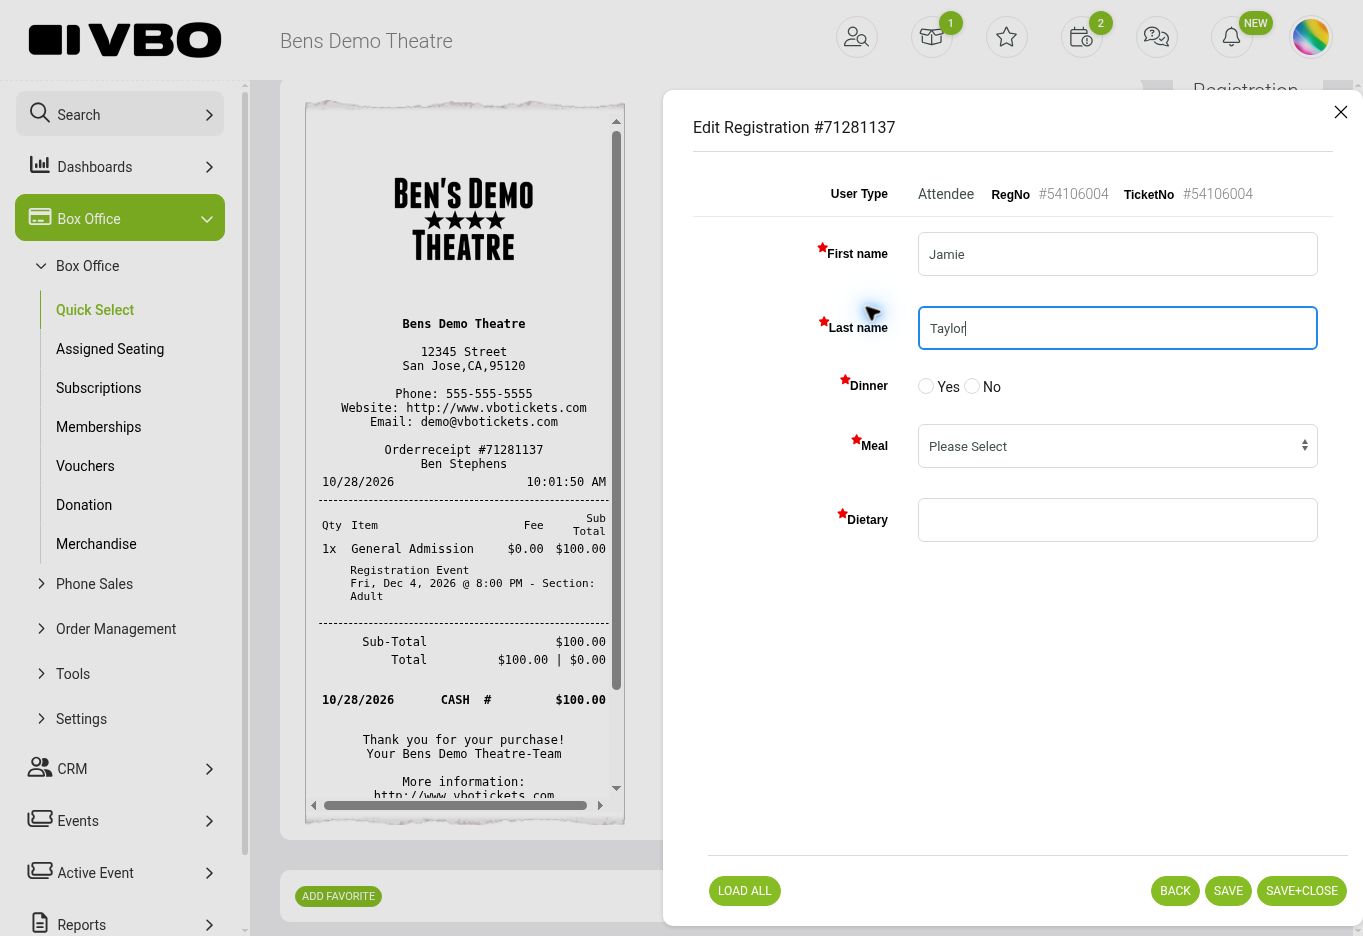
The staff editor uses internal field names and can display all fields together, including conditional follow-ups. Fill the answers appropriate to that attendee; its layout differs from the patron’s online form.
Edit answers later
Find and expand the order, then use the registration edit option on the ticket. Select the relevant attendee, update the answers, and save.
7. View and export registration responses
Go to Reports > Event Reports, select Open Events or Closed Events as appropriate, and choose Registrations Report. Select the event and use the report’s Print or Export option. The event must have a ticket with a registration form and type attached. Custom User Info questions use a separate feature and report.
Fees and registration time
Registration fees follow your account’s configured registration fee rules. Standard promoter users cannot change the registration fee rate. Who pays the fee is controlled by the applicable online, Box Office, or phone-sales fee settings. Contact support if you need help confirming your configuration.
To review the registration timeout setting, go to Events > Registrations > Registration Settings, choose Registration Timeout, and save. Checkout versions can handle timers differently; verify the countdown in your online preview instead of assuming a universal default.