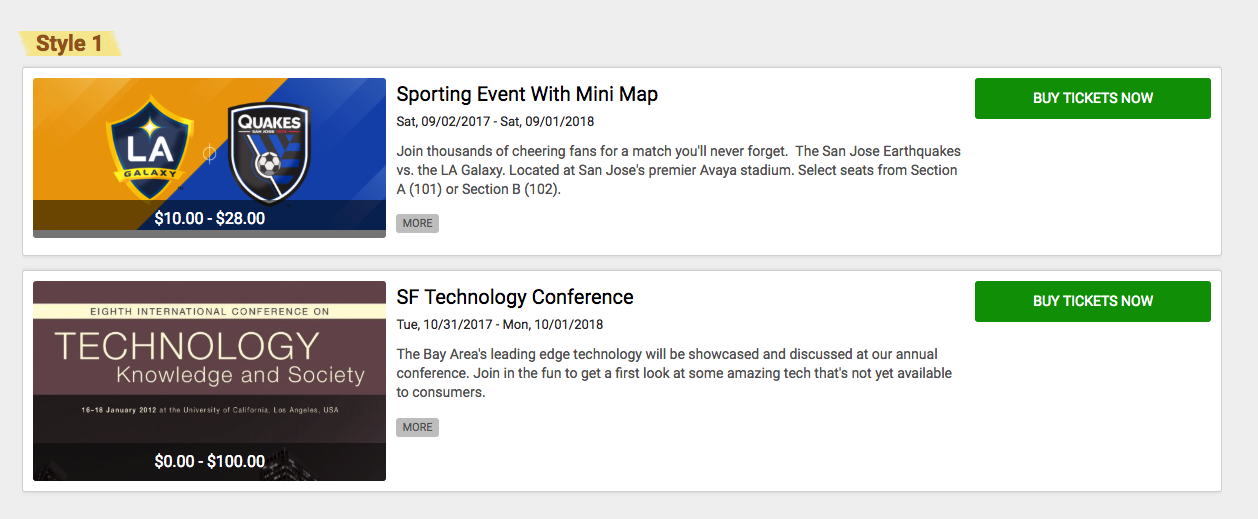
Use List Event Widgets to display events
outside of the plugin. This is useful in cases
where you simply want to display or promote
one event on a page, like your home page, or
list the next 4 upcoming events in your page's
sidebar, or set up a donate now button
somewhere on your site! Get creative, and
display events in a List Events Widget by
copying the HTML and CSS below. Paste those
into your newly created widget settings, and
you're done!

Style 1 html – copy/paste this
into your widget html area inside VBO.
<div class='event'>
<div class='eventwrapper clearfix'>
<div class='vbocol-1'>
<div class='posterwrapper'>
<div class='event-price'>{PRICERANGE}</div>{POSTER}</div></div>
<div class='vbocol-2'>
<div class='event-name'>{EVENTNAME}</div>
<div class='event-date'>{EVENTDATE}</div>
<div class='event-info'>{EVENTINFO}</div>
<div class='more-button'>{MORE}</div> </div>
<div class='vbocol-3'>
<div class='event-button'>{BUTTON}</div> </div> </div> </div>
Style 1 css –
copy/paste this into your widget css area or
your website stylesheet
/* outer structure */
.event { overflow: hidden; }
.eventwrapper { width: 100%; margin: 7px 0; padding: 10px; background-color: #fff; border: 1px solid #dadada; border-radius: 3px; box-shadow: 0 0 5px rgba(0, 0, 0, 0.12); }
/* inner elements */
.posterwrapper { position: relative; max-height: 200px; overflow: hidden; border-radius: 3px; }
.event-price { position: absolute; font-size: 16px; color: #fff; text-align: center; background: rgba(0,0,0,0.5); width: 100%; padding: 6px; bottom: 0; } .event-pic { height: auto; width: 100%; }
.event-name { padding: 0 0 0 10px; color: #000; font-size: 20px; }
.event-date { padding: 0 0 0 10px; color: #333; font-size: 13px; margin-bottom: 10px; }
.event-info { position: relative; height: 4.1em; overflow: hidden; font-size: 14px; line-height: 1.4; padding: 0 10px; }
.event-info:after { content: ''; text-align: right; position: absolute; bottom: 0; right: 0; width: 70%; height: 1.4em; background: linear-gradient(to right, rgba(255, 255, 255, 0), rgba(255, 255, 255, 1) 50%); }
.event-button .button { display: block; width: 100%; font-size: 14px; padding: 9px 15px; text-align: center; background-color: #07A303; color: #fff; }
.more-button { text-align: left; padding: 10px; }
.more-button .button { background: #ccc; color: #666; font-size: 11px; padding: 3px 6px; }
.more-button .button:hover { background: #dadada; color: #333;}
.button { border-radius: 3px; text-transform: uppercase; font-weight: normal; text-decoration: none; }
.button:hover { background-color: #70b96a; border-color: #98E992; color: #fff; text-decoration: none; }
/* layout */
.clearfix:after { content: ''; visibility: hidden; height: 0px; display: block; clear: both; }
.vbocol-1, .vbocol-2, .vbocol-3 { position: relative; float: left; }
.vbocol-1 { width: 30%; }
.vbocol-2 { width: 50%; }
.vbocol-3 { width: 20%; }
@media only screen and (max-width: 640px) { .vbocol-1, .vbocol-2, .vbocol-3 { float: none; width: 100%; }
.event-info, .eventdate-info, .more-button, .event-name, .event-date { padding-left: 0; padding-right: 0; }
.event-name { margin-top: 10px; }
.more-button { margin-bottom: 10px; } }.
Here is a video demo on the calendar
widget, list widget, and donation
widget:
*NOTE: The donation widget explanation in the last part of this video is out of date. Refer to the new video below for the donation widget tutorial.
Updated Donation Widget Tutorial
*NOTE: You cannot place a donation widget on the same page where a plugin exists. This will break.
CSS for updating your donation widget button color:
.DonateHeader { background-color: #7FC241; }